Tuesday, 22 August 2017

Steak and Kidney Pie

Abbatoir - An establishment where livestock are slaughtered for their edible products (meat and offal) and their by-products (leather, bristles, horsehair, horns)

Hey Everyone,

I know that the definition above isn't one that some of you may not want to discuss in detail, so I'll skip over that for your sakes! (If anyone wants to find out more you can easily get further information on the internet or you can contact me in the comments section...)
This dish could be linked to the definition if you squint, but I suppose not much else can apply either anyway! Therefore, I am pleased to announce that I'll be making steak and kidney pie - a big favourite of mine!

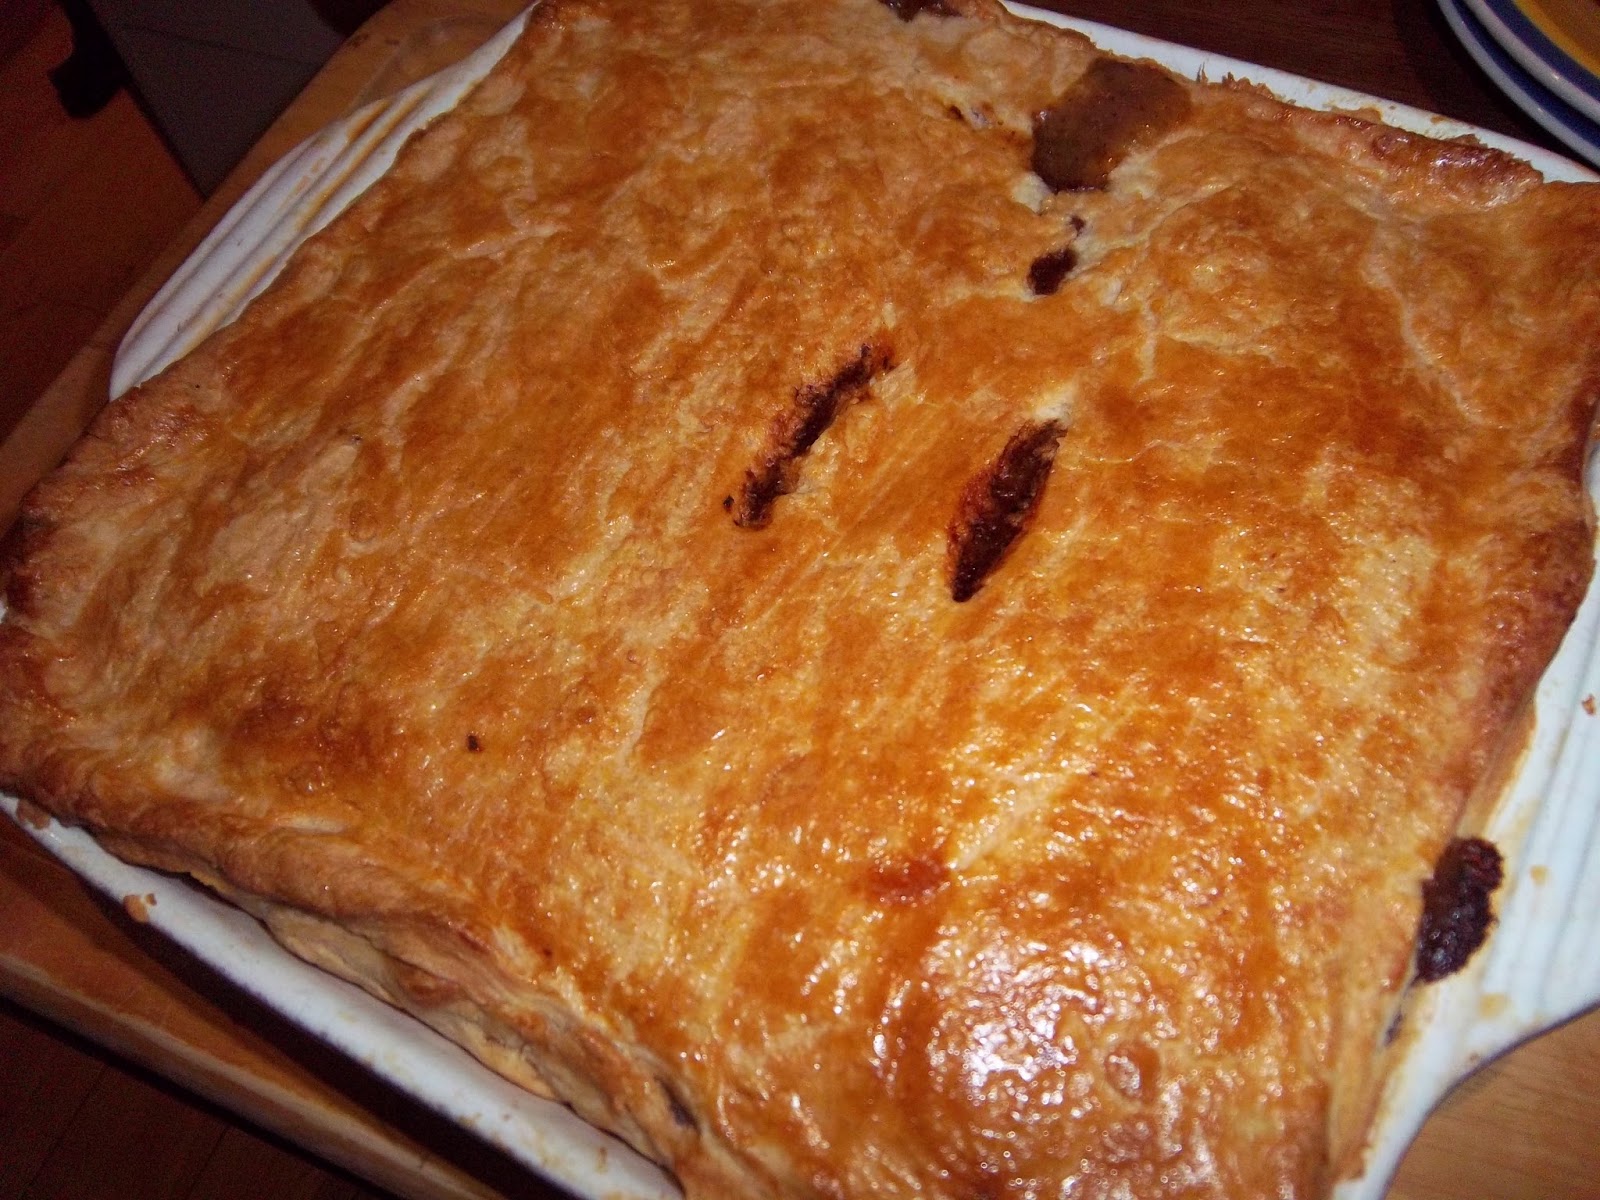
It has a rich, meaty flavour and the suet pastry is wonderfully crumbly as the crust. I tend to cook my meat in a slow cooker instead of how the recipe says as it make the meat a lot more tender and it also is a lot easier, though you can do it how you like! I really hope that some of you try out this recipe as after all, nothing beats a good old-fashioned steak and kidney pie! (Especially one made by my Grandma - she is the best at making it!)

Steak and Kidney Double Crust Pie - From "Sunday Treats"  in "The Big Baking Collection"

Ingredients -

  • 4 Tbsp Olive Oil, plus extra for greasing
  • 2 Onions, finely chopped
  • 100g Button Mushrooms, wiped, halved or quartered if necessary
  • 600g Stewing Steak, such as Chuck, cut in 3cm chunks
  • Sea Salt and Freshly Ground Black Pepper
  • 4 Tbsp Plain Flour
  • 600ml Beef Stock
  • Large Sprig of Thyme
  • 30g Unsalted Butter, at room temperature
  • 4 Fresh Lamb's Kidneys, about 200g in total
For the Suet Crust Pastry
  • 300g Self-Raising Flour, plus extra for dusting
  • 150g Beef or Vegetable Suet
  • 1/2 Tsp Salt
  • 1 Egg, beaten, for glazing
1. In the pan, heat 3 tablespoons of oil and fry the onion for 5 minutes until soft, but not browned. Add the mushrooms and fry for 3-4 minutes until they begin to colour in places. Remove the vegetables from the pan with a slotted spoon and set aside.

2. Toss the steak in 2 tablespoons of seasoned flour. Heat the remaining oil in the pan on high heat, and fry the meat until browned. Don't overcrowd the pan or the meat will steam rather than brown. Remove the meat as it cooks and add it to the vegetables. Once the meat is seared, return it with the vegetables to the pan. Cover with the stock. Season, add the thyme, and bring to the boil. When boiled, reduce the heat to low, cover, and cook for 2 - 2 1/2 hours until tender.

3. For the pastry, rub together the flour and the suet until it resembles crumbs. Add the salt and enough cold water to bring the mixture together to a soft dough. Wrap in cling film and rest it for 1 hour.

4. Make a paste out of 2 tablespoons of plain flour mashed into the butter. Uncover the stew and increase the heat. When it begins to boil, add the flour mixture, a little at a time, stirring. Reduce heat and cook over a low heat for 30 minutes until the sauce thickens.

5. Preheat the oven to 180°C/340°F/Gas 4. Trim the kidneys of any skin, cut out the central core, and cut into chunks. Add them to the stew. On a floured surface, roll out the pastry into a 20 x 40cm rectangle, 3 - 5mm thick. Place the pie dish onto a short edge of the pastry and cut a circle around it for the lid.

6. Oil the tin, trim the remaining pastry, and use it to line the pie dish, allowing the sides to overhang. Fill the case with the pie filling and brush with egg around the edges of the pastry. Top with the disk of pastry and press down the edges to seal. Brush the pie with egg , then cut 2 small slits in the top to allow steam to escape. Bake in the middle of the oven for 40 - 45 minutes until golden brown. Remove from the oven and allow it to cool for 5 minutes before serving.

Enjoy!!!

Tuesday, 15 August 2017

Raspberry Meringue Roulade

Abalone - 'see ormer'
                 A large single-shelled mollusc found off the Pacific Coasts of Asia and Mexico, in the Mediterranean and off the European Atlantic Coast

Hey Everyone,

For those of you who didn't read my update from last week, I've decided to a culinary definition every post and (sometimes) try to relate what I made to it! So, what does Raspberry Meringue Roulade have to do with a large single-shelled mollusc I hear you ask? The answer to that would be absolutely nothing of course! Already I have failed you, but I did warn you this was bound to happen over the course of the blog - there is no love lost between me and most weird seafoods so I decided to make a delicious dessert instead!


And delicious the roulade is! Where a sponge would typically be in a normal roulade, instead there is a  beautifully light and soft meringue. (This allows you to eat twice as much as usual, of course!) The almonds on the outside give it the added texture needed; the crunch of the nuts perfectly countering the smooth cream and meringue. Raspberries are the perfect fruit for the roulade, their juices adding a great flavour to the cream as well - strawberries and blueberries among other fruits would also be great in this sort of dish,so why not try using them as well?

Raspberry Meringue Roulade

Cake Tin needed: a 33cm x 23cm (13 x 9 in) Swiss Roll tin

Ingredients -

  • 5 Large Eggs
  • 275g (10oz) Caster Suagr
  • 20g (2oz) Flaked Almonds
For The Filling
  • 300ml Whipping / Pouring Cream
  • 350g Fresh Raspeberries
1. Preheat the oven 220°C/Fan 200°C/Gas 7. Line the tin with non-stick parchement.

2. Whisk the egg whites until very stiff. Gradually add the sugar, a teaspoon at a time, whisking well between each addition. Whisk until very, very stiff and all the sugar has been added.

3. Spread the meringue mixture into the prepared tin and sprinkle with the almonds. Place the tin fairly neat the top of the preheated oven and bake for about 8 minutes until pale and golden. Then reduce the temperature to 160°C/325°F/Gas 3 and bake the roulade for a further 15 minutes until firm to the touch.

4. Remove the meringue from the oven and turn it almond side down onto a sheet of non-stick baking parchment. Remove the parchment from the base of the baked meringue and allow it to cool for about 10 minutes.

5. While the meringue is cooling, whisk the cream until it stands in stiff peaks, and gently mix in the raspberries. Spread the cream and raspberries evenly over the cooled meringue. Start to roll up from the long end fairly tightly until rolled up like a roulade. Wrap in non-stick baking parchment and chill before serving.

Enjoy!!!

Monday, 7 August 2017

Cherry Pie

Abaisse - A term used in French cookery for a sheet of rolled out pastry. Hence, abaisser means to roll out thin, as for a pasty base.

Hey Everyone,

For anyone who has read my blog before, you may notice a small change to my usual posts - that being the added definition at the top. Recently, some friends of my parents have moved away from the area and as a result they have given away and sold a lot of the things they don't need to take with them. Whilst this may not seem to have anything to do with the definition, I assure it does! As they knew I'm an aspiring chef, it was to me that they gave the most amazing book ever (in my opinion)! Although it is an encyclopedia, instead of containing ALL the words EVER, it has everything and anything to do with French cuisine! The "Larousse Gastronomique" is officially one of my favourite books and I've decided that I'm going to add a definition at the top of every post I do... This won't mean that my blog will solely be related to French cuisine, as I won't always relate it to the book. I'll just write the definition and continue as I normally do; sometimes you can't relate it to anything as it could be a custom or a profession!


Due to my not updating for so long, what few regular readers that I had have now gone unfortunately, so I'll be updating for regularly to keep it interesting, as I'm on my holidays (I'll have SO much more time to do everything)!
Anyway, this week, I'm making an amazing cherry pie! (If you haven't noticed this can be related to our post definition - rolling out the pastry!) Currently, cherries are in season - at least they are in the UK - so if you want to use fresh and local cherries, now is the perfect time to use them...


Cherry Pie - From "The One and Only Pies and Tarts Cookbook"

Prep Time - 20 mins, plus 30 mins soaking and 20 mins chilling
Cooking Time - 35 mins
Serves 4

Ingredients -

For the Filling
  • 500g Cherries, pitted
  • 3 Tbsp Sugar
  • 1 Tbsp Kirsch
For the Pastry
  • 400g Plain Flour
  • 200g Butter
  • 500g Caster Sugar
  • 2 Egg Yolks
To Finish
  • 1 Egg, Beaten
1. For the filling, toss the cherries and sugar together with the kirsch and leave to stand for 30 minutes.

2. For the pastry, put the flour in a mixing bowl and rub in the butter until the mixture resembles breadcrumbs. add the caster sugar and egg yolks and mix to a dough. If it is too stiff add a little cold water. Wrap in cling film and chill for 20 minutes.

3. Heat the oven to 190°C/375°F. Grease a large pie dish.

4. Roll out half of the pastry and line the pie dish. Put the cherry mixture in the dish.

5. Roll out the remaining pastry and cut out a lattice pattern with a sharp knife or a lattice cutter. Place on top of the pie and crimp and seal the edges. Brush with a beaten egg.

6. Bake for 30 - 35 minutes until the pastry is crisp and golden.

Enjoy!!!

Wednesday, 26 July 2017

Brioche

Hey Everyone,

It has been such a long time since I last updated! I've just been busy with so much - exams, work experience, too much homework, exams, cycling (injuries), revision and exams! It's been great! Hopefully, now that I'm on my summer holidays I'll be able to update a lot more regularly - maybe even more than twice a week, which would be very organised for me... I have the memory of a sieve and I can spend the day doing nothing, realising at 9.30pm that I haven't written up my blog!
Anyway, to start up fresh I've made a beautiful brioche that  I'd definitely recommend to anyone - particularly if you enjoy making a really satisfying loaf. The end result is certainly any bakers dream. This is an enriched loaf, perfect with butter - a delicious light lunch when toasted, though it could easily pass as a perfect breakfast! I serve mine as a dinner for the family, fried and served with fired mushrooms, crème fraîche, salt and pepper, chopped parsley and fried ham, an amazing combination that really enhances the buttery flavour of the brioche!


Classic Brioche - From "Bread, Cake, Doughnut, Pudding" By Justin Gellatly

Prep Time - 25 Minutes
Proving/Resting Time - 5 Hours, plus overnight
Cooking Time - 25 Minutes

Makes 1 750g loaf

Ingredients -

  • 500g Strong White Bread Flour
  • 12g Fine Sea Salt
  • 30g Caster Sugar
  • 15g Fresh Yeast, crumbled (or 7g Dried Yeast)
  • 6 Eggs
  • 250g Softened Unsalted Butter, plus extra for greasing
  • 1 Egg, beaten, to glaze
1. Put the flour, salt and sugar into the bowl of an electric mixer. Crumble the yeast in s bowl and break in the eggs. Whisk the eggs and yeast together to dissolve the yeast. Pour the egg mixture into the dry ingredients and the, using a dough hook attachment, mix on a medium speed for 6-8 minutes, or until the dough starts to come away from the sides. Turn off the mixer and let the dough rest for 5 minutes.

2. Start the mixer up again on a medium speed and while it is running slowly add the butter to the dough, a little at a time, until incorporated (don't add the butter too quickly, otherwise it will ruin the dough). Once the butter is incorporated, mix on a high speed for 4 minutes, until the dough is smooth glossy and elastic when pulled, then cover the bowl with clingfilm and leave until it has doubled in size (this will take about 2 hours). Knock back the dough, then re-cover and put into the fridge overnight to chill.

3. The next day, grease a 750g loaf tin, measuring about 28cm x 12cm x 10cm. Take the dough out of the fridge, mould it into a loaf shape and place it in the prepared tin, pressing the dough down into each corner so that it is even. Leave somewhere warm to prove until it reaches the top of the tin, which will take about 3 hours.

4. Preheat the oven to 180°C/Fan 160°C/Gas Mark 4. Glaze the brioche with the beaten egg and bake for 20 minutes, then take it out of the tin and put it directly on the oven shelf for another 5 minutes.

5. Put on a rack to cool down, and serve warm or toasted.

Please Enjoy!!!

Saturday, 20 May 2017

Bread Boats

Hey Everyone,

A bread for brunch this week! From one of my favourite recipe books, Sirocco, this bread is from Persian cooking - a far stretch from what I usually make at home, so the unusual flavour combinations seem (and are) very exotic! It might be quite a strange thing to crack an egg on a bread, but I can assure that it tastes really nice, even if I did manage to break the yolk of ALL my eggs - I trust that you can avoid my rookie mistake!


For those of you who aren't too keen on a whole lot of spice in your cooking, I will warn you that the cayenne pepper really adds a kick! However, my Grandad, a devout hater of hot food, really enjoyed it, so why not give it a go anyway?!


Bread Boats - From "Sirocco" By Sabrina Ghayour

Makes 4

Ingredients -

  • 7g Sachet Fast-Action Dried Yeast
  • 500ml Warm Water
  • 700g Warm Water
  • 700g Strong White Flour
  • 2 Heaped Tbsp Crushed Sea Salt Flakes
  • 75ml Olive Oil
  • 50g Butter, melted
For the Filling


  • 6 Large Eggs
  • 250g Ready Grated Mozzarella (not Buffalo Mozzarella)
  • 120g Young Spinach Leaves, roughly chopped
  • 4 Spring Onions, thinly sliced
  • 1 Tsp Cayenne Pepper
  • A Pinch of Grated Nutmeg
  • Finely Grated Zest of 1 Unwaxed Lemon
  • Sea Salt Flakes and Freshly Ground Black Pepper
1. Stir the yeast into 50ml of the warm water, then allow it to sit for a few minutes until it has dissolved.

2. In a large bowl, combine the flour, and crushed salt, then make a well in the centre. Pour in the remaining warm water, 50ml olive oil and the yeast dissolved in water and combine using your hands until you have a smooth dough. If the dough is a bit sticky, just add a little extra flour and, if it is dry, an additional splash of warm water.

3. On a clean, floured surface, knead the dough for 5 minutes to activate the yeast and stretch the glutens within it. Allow the dough to rest for 10 minutes before kneading it again for 2 minutes. Repeat this process another 3 times and, on the second, incorporate the remaining 25ml olive oil. Return the dough to the bowl, cover with a clean towel and leave to rest for 3 hours. Once the resting period is over, the dough will have tripled in size.

4. Preheat the oven to 230°C/Gas Mark 8. Line a large baking tray with baking paper. Divide the dough into 4 equal portions and shape the dough into a "boat" shape and place on the lined tray. Cover loosely with clingfilm and leave to rest in a warm place for 45-60 minutes.

5. Make the filling. In a mixing bowl, beat 1 egg with the mozzarella, spinach, spring onions, cayenne, nutmeg and lemon zest and season well with salt and pepper. Blend well until the mixture is smooth.

6. Divide the remaining mixture into 4 equal portions and place 1 in the centre of each bread boat, leaving 2.5cm clear at the edges. Pick up the clear edges of dough and tuck the inwards to secure the filling. Beat 1 of the remaining eggs and brush any exposed pastry dough with this egg wash. Bake for 15-17 minutes, remove from oven and carefully crack 1 egg into the centre of each boat. Bake for 6-8 minutes more or until the egg whites are opaque.

Please Enjoy!!!

Sunday, 14 May 2017

Blueberry Muffins

Hey Everyone,

One of my favourite snacks has always been blueberry muffins and the same definitely goes for my sister as well. In fact I've been meaning to make them for a while because whilst the shop bought ones are delicious, there is nothing better than a homemade one muffins - especially if it contains blueberries! This particular recipe is from a children's cookery book, though it is a bit different from your average one as it's written by Paddington Bear, so it must be good! Everything in it's amazing... Even the marmalade according to my Mum, though I'm not so much of a fan myself!
These muffins were made using plenty of fresh blueberries for a way nicer flavour and it also improves the look too. Remember to eat them straight out of the oven warm - aren't all cakes best warm? Especially blueberry muffins too, due to the sweet and sticky blueberries that burst in the oven, with a light cake around them!


Blueberry Muffins - "Paddington's Cookery Book" By Michael Bond

Makes 12 Muffins

Ingredients -

  • 125g Caster Sugar
  • 200g Plain Flour
  • 2 Tsp Baking Powder
  • 175ml Milk
  • 2 Eggs
  • 150ml Vegetable Oil
  • 1 Tsp Vanilla Extract
  • 200g Blueberries
1. Preheat the oven to 180°C/350°F/Gas Mark 4.

2. Put the sugar in the mixing bowl. Sift the flour and baking powder on the top. In the other bowl, whisk the eggs, milk, oil and vanilla extract together until smooth.

3. With a whisk, make a well in the centre of the flour mixture and beat in the liquid mixture quickly and roughly. Don't worry about the odd lump - speed keeps the air in and makes the muffins light.

4. Quickly fold in the blueberries with a large metal spoon. With the tablespoon place the mixture into 12 muffin cases.

5. Bake for 30 minutes, until golden brown and risen.

Please Enjoy!!!

Sunday, 7 May 2017

Cinnamon Pull-Apart Bread

Hey Everyone,

Although I have been posting a lot of recipes for bread recently, this is a different type as it's a sweet bread, flavoured with cinnamon.
Typically in our house, if we have a sweet snack it will be something like a cupcake (which we never seen to have a shortage of!), but this bread seemed too irresistible to not make! I found the recipe in one of the many recipe books I have for young children - I find that many of the best recipes to make are in cookbooks for kids as they are always practically foolproof! Making pull-apart bread was a new experience for me and was very interesting too - definitely something that I will be using in the future again. Instead of making the dough into one loaf at the beginning straight away like usual, you have to cut it into squares and stick them together in a loaf tin, so that after baking it can be easily shared, "pull-apart" as the name suggests! If you've never made it before then I would really recommend you do, and for those of you who already heave, why not make it again?!


Cinnamon Pull-Apart Bread - "The Children's Book of Baking Bread"

Makes 1 loaf

Ingredients -

  • 450g Strong White Bread Flour
  • 1 Tsp Caster sugar
  • 1 1/2 Tsp Fast-Action Yeast
  • 20g Butter
  • 300ml Milk
For the Filling
  • 75g Butter, softened
  • 75g Caster Sugar
  • 4 Tsp Ground Cinnamon
For Sprinkling
  • 1 Tsp Caster Sugar
You will need a 900g loaf tin

1. Grease the tin and line it with parchment. Put the flour, sugar and yeast in a large bowl and mix with a wooden spoon. Put the butter and half the milk in a pan. Heat gently until the butter melts. Take the pan off the heat. Add the rest of the milk, then pour it on the flour mixture.

2. Mix with a spoon, then use your hands to bring the mixture into a bowl. Sprinkle a little flour on a clean surface. Put the dough on the surface. Knead for about 10 minutes, or until it feels smooth and springy. Put it back in the bowl.

3. Cover the bowl tightly with a plastic food wrap. Put it in a warm place for about 50 minutes, or until the dough has doubled in size. While the dough is rising, make the filling. Put the butter in a bowl. Beat with a wooden spoon until it's soft and smooth. Add the sugar and cinnamon and mix well.

4. When the dough is ready, put it back on the surface. Knead gently for 2 minutes. Then, sprinkle a rolling with a little flour. Using a sharp knife, cut the dough into three pieces. Roll out each one into a long triangle around 1/2cm thick. The short side should be narrower than the end of your loaf tin.

5. With a blunt knife, spread the filling over each rectangle until all of them are covered. Stack the rectangle;es on top of each other. Using the sharp knife, cut the stack into rough squares. Pack them all into the tin side-by-side, with the sides standing upright.

6. Cover with a plastic wrap. Put in a warm place for 30 minutes, or until the dough has risen above the top of the tin. Remove the plastic wrap and sprinkle on the sugar. Heat the oven to 200°C/400°F/Gas Mark 6. Bake for 10 minutes, then cover the top with kitchen foil. Turn down the oven to 160°C/350°F/Gas Mark 4.

7. Bake for a further 30-35 minutes. Stand the tin on a wire rack for 20 minutes to cool. Then turn out the loaf.

Please Enjoy!!!

Saturday, 22 April 2017

Okonomiyaki

Hey Everyone,

So, this week I'm making a popular Japanese dish called okonomiyaki. Okonomiyaki is an incredibly versatile dish which is translated into "how you like" from "okonomi" and "grill" from "yaki". They are often called "How you like it pancakes", though the name is a bit of a misnomer as they don't really have the same texture or taste.
The savoury pancake is called the "how you like it pancakes" because after the two staple ingredients of the batter and cabbage, you can add whatever you like as a topping - this can be anything from meat and seafood to wasabi and cheese. The recipe I used contains spring onions, ginger and carrot with a topping of wasabi mayonnaise and toasted sesame seeds, a combination with amazing results!


Japanese-Style Shredded Vegetable Pancakes - From a Waitrose magazine

Prepare Time - 10 Minutes
Cooking Time - 10 Minutes
Serves 4 as a starter

Ingredients -

  • 100ml Vegetable Stock, cooled
  • 1 Tbsp Soy Sauce
  • 2 Large Eggs
  • 50g Plain Flour
  • 2 Tsp Finely Chopped Fresh Ginger
  • 4 Salad Onions, finely chopped
  • 65g Pointed Cabbage (about 3 leaves), stalks removed and very thinly sliced
  • 1 Large Carrot
  • 1 Tbsp Sunflower Oil
To Serve
  • 1 Tbsp Mayonnaise
  • 1 Tsp Wasabi Paste
  • 1 Tsp Sesame Seeds, toasted
  • Sushi Pickled Ginger
1. In a bowl, whisk together the stock, soy and eggs until well combined. Place the flour in a separate bowl, make a well in the centre and pour in the stock mixture. Whisk to a smooth batter, then stir in the ginger, salad onions, cabbage and carrot.

2. Heat half of the oil in a small (about 21cm) frying pan. Spoon in half of the mixture and cook over a medium heat until a golden crust starts to form around the edges and the bottom is golden and set.

3. Use the spatula to flip the pancake over and cook for 3 minutes more until set. Tip out onto a chopping board and repeat with the remaining mixture.

4. Mix together the mayonnaise and wasabi and spoon into a small bowl. Then, cut each pancake into wedges and serve with the wasabi mayonnaise, toasted sesame seeds and pickled ginger alongside.

Please Enjoy!!!

Saturday, 15 April 2017

Soft Pretzels

Hey Everyone,

Whilst some people may have expected a post about Easter, I've really wanted to make these for a while, so I'm making them instead! This week I'm making pretzels - not the small, harder ones, but the massive soft ones! This type of pretzels has a very distinctive bread-like fluffy inside and a dark brown shine on the outside which provides a chewiness to the outer crust, not dissimilar to a bagel.
Whilst I haven't actually put a topping on my on my pretzels, but you can add seeds or salt if you want - its nice sugared too! This bread takes 45 minutes to prove, so you have plenty of time to shape and bake your pretzels so they're perfect!


The reason these pretzels and bagels have such a similar crust is due to the way they have been cooked. Both of the breads have been twice cooked, first poached and then baked after. The distinct chewy crust is obtained from the bicarbonate of soda added to the poaching water - remember that when adding it, all the water will froth up, so be careful! Whilst poaching, keep a very close eye on the pretzels as the two minutes are over in the blink of an eye, and you won't want them to get too soggy!


At first, looking at the shape of a pretzels may seem daunting, but a pretzel knot is surprisingly easy to do with the right visual cues! All it takes is three short steps, so I've added the three pictures below so that you have a guide when attempting to knot it - I don't think that writing "loop it round like this" will be very helpful without knowing what "this" means in context!


If you do end up making them, I'd advise eating them on the day you make them, as even in an airtight container, the day after they gain a sort of weird sogginess - not the texture you want in a pretzels , or any type of bread! Sometimes during the poaching you may find that the pretzels' shape distorts a little, but don't worry, once its out of the pan and on the tray, you can alter the shape - though be warned the dough will be very hot as it has just been in boiling water.

Soft Pretzels - From "The Children's Book of Baking Bread"

Makes 8

Ingredients -

  • 400g Plain Flour
  • 1 1/2 Tsp Fast Action Yeast
  • 1 Tsp Caster Sugar
  • 3/4 Tsp Salt
  • 40g Butter
  • 250ml Hand-Hot Water
  • 100g Bicarbonate of Soda
For the Topping -
  • 1 Medium Egg
  • 2 Tbsp Sesame Seeds (Optional)
1. Line the baking tray with parchment. Put the flour, yeast, sugar and salt in a big bowl. Mix them together with a wooden spoon. Put the butter in a medium pan. Heat gently until the butter melts. Take the pan off the heat. Pour the hand-hot water slowly and carefully into the pan.

2. Then, pour the butter and water mixture into the big bowl. Mix well, then. use your hands to bring everything into a ball. Dust a clean surface with flour. Knead the dough for around 5 minutes, or until smooth and springy.

3. Oil a large bowl. Put the dough in the bowl. Cover tightly with a plastic food wrap. Put in a warm place for around 45 minutes, or until the dough has doubled in size. Oil a clean surface and your hands. Put the dough on the surface and knead for around 3 minutes to squeeze out the tiny air bubbles.

4. Heat the oven to 220°C/400°F/Gas Mark 4. Put 2 litres of cold water in a saucepan. Put a lid on and put the pan over a high heat. While the water is heating, cut the dough into 8 pieces. Roll one piece into a thin sausage around 70cm long. Take one end and loop it around like this (see first picture).

5. Loop the other end around in the same way (see second photo). Then, hold one end in each hand. Twist them around each other, so the ends swap places (see third photo). Pat the ends down, so they stick. Put the pretzel on the baking sheet. Roll and twist all the other pieces of dough in the same way to make 8 pretzels.

6. When the water is bubbling, turn of the heat. Stir in the bicarbonate of soda. Lower in 2 pretzels. Wait for 2 minutes, lift them out and put them back on the baking sheet. Do the same with the other pretzels. Separate the egg. Brush the egg yolk over the pretzels and sprinkle on any seeds. Bake for 10 - 15 minutes until dark brown and shiny.

Please enjoy, and for those of you who are interested, why not visit my other post of bagels?!!


Friday, 14 April 2017

Malay Fried Rice

Hey Everyone,

So this week we literally had the ENTIRE family over for dinner - well, maybe that's an exaggeration, but 10 people is still a lot, right? Anyway I - for some reason - volunteered to cook for the masses, and what better to make than a foolproof dish from Mary Berry?
I decided to make something different, and due to it being fairly simple, it was Malay Fried Rice that I chose to make, from a recipe book I'd got for Christmas two years ago. It was met with approval by all, though my older brother said it was nothing like that food he'd had in Malaysia - not that he was complaining as it was still really tasty, so I think we can forgive Mary Berry for that!
The original recipe cooked for 6 people which entails enough chopping in itself, so maybe stick to cooking for less people, for those of you with less time on their hands!


Malay Fried Rice - From "Mary Berry Absolute Favourites" By Mary Berry

Serves 6

Ingredients -

  • 250g Long-Grain Rice
  • 150g Frozen Petit-Pois
  • 5 Tbsp Oil, plus extra for the eggs
  • 2 Skinless, Bonless Chicken Breasts, sliced into strips roughly the size of your little finger
  • 1 Tbsp Runny Honey
  • 2 Large Onions
  • 3 Garlic Cloves, crushed
  • 1 Red Pepper, deseeded and cut into 1cm dice
  • 200g Button Mushrooms, sliced
  • 1/2 Tsp Medium Chilli Powder
  • 1 Tbsp Curry Powder
  • 4 Tbsp Soy Sauce, plus extra to serve
  • 6 Eggs
  • Salt and Freshly Black Pepper
1. Tip the rice into a pan of boiling, salted water and boil according to the packet instructions, adding the frozen peas 3 minutes before the end of cooking. Drain well and set aside.

2. Heat 1 Tbsp of the oil in a large frying pan or wok. Add the chicken strips and season with salt and pepper. Drizzle in the honey and toss over a high heat for 4-5 minutes or until the chicken is golden all over and cooked through. Remove from the pan and set aside.

3. Pour the remaining oil into the same frying pan, add the onions, garlic and red pepper and fry over a high heat for 4-5 minutes, stirring occasionally. Add the mushrooms and spices, stirring well to combine, and fry for a further minute. Tip in the cooked rice and peas, add the chicken strips and soy sauce and toss together over a high heat, seasoning to taste with salt and pepper.

4. Heat with a little oil in a large, non-stick frying pan and fry the eggs until the whites are set.

5. Divide the chicken and rice between plates, placing one fried egg on top of each portion. Sprinkle the eggs with salt and pepper to taste and serve with extra soy sauce if you like.

Please Enjoy!!!

Saturday, 8 April 2017

Pear Pies

Hey Everyone,

I know I haven't done many of these recently, but finally, I'm posting something sweet!
These individual pear pies are made in ramekins with buttery puff pastry, and are full of sugary goodness! Whilst they seem to take an AGE to bake, they're relatively east yo make - in fact all you have to do is roll out pastry, peel pear, assemble, bake, done!
The crushed cardamon seeds combined with the dark brown sugar really make the pears more tasty and they almost have the texture of being poached once out of the oven.


If you can see in the picture, I haven't put the pastry around the pears in the way that the recipe asks - this was simply for convenience as I was beginning to run out of time. This means that if you are making them, don't follow my picture if you want the finish the recipe says, as they shouldn't look like that!


Pear Pies - From "The One and Only Pies and Tarts Cookbook"

Prep Time - 20 Mins
Cooking Time - 30 Mins
Serves 4

Ingredients -

  • 500g Puff Pastry
  • 4 Ripe Pears, peeled with stalks still intact
  • 1 Tsp Cardamon Seeds, crushed
  • 4 Tbsp Dark Brown Sugar
  • 1 Egg, beaten
  • 3-4 Tbsp Demerara Sugar
1. Preheat the oven to 200°C/400°F. Grease 4 deep ramekins or bowls. Divide the pastry into 4 and roll each piece into a circle larger than the pears. Reserve the pastry trimmings.

2. Mix the cardamon seeds and sugar and sprinkle on the pastry circles. Put a pear upright on each pastry circle and brush the edges of the pastry with water and fold the pastry to come about three-quarters up around the pear. Put into the ramekins.

3. Roll out the pastry trimmings and cut 4 wide strips. Dampen the edges and attach to the edge of the ramekins. Brush the pastry with a beaten egg and sprinkle with demerara sugar. Bake for 30 minutes until the pastry is golden and the pears are soft.

Please Enjoy!!!

Saturday, 1 April 2017

Floury Baps

Hey Everyone,

I know bread three weeks in a row! This is another quick and easy recipe from one of my favourite recipe books that my uncle got me for Christmas by the Fabulous Baker Brothers. I could make literally anything and everything in it, but this week I'm making simple but tasty baps, perfect for a breakfast sarnie or to fill with goodies from the barbecue!
These were made in my house specifically for the morning, because there is nothing better than a full English breakfast with fresh bread to start the weekend! Floury baps will only take a brief period of time to be kneaded, with only one and a half hours to prove. This means if you have to willpower to get up early, everyone can easily have fresh, soft bread for breakfast!


Floury Baps - From "The Fabulous Baker Brothers" by Henry and Tom Herbert

Makes 4

Ingredients -

  • 5g Dried Yeast
  • 50ml  Tepid Water
  • 250g Strong White Flour, plus extra for dusting
  • 1 Tsp Caster Sugar
  • 10g Butter
  • 5g Sea Salt
  • 100ml Tepid Milk
  • 1 Egg, beaten
  • Poppy Seeds, to sprinkle over (Optional)
1. Stir the yeast into the tepid water and set aside to dissolve.

2. Weigh the flour, sugar, butter and salt into a large bowl and add the milk. Add the dissolved yeast and mix thoroughly into the dough. Turn it out onto a lightly floured surface and knead for 15 minutes until it is soft and elastic. Leave to rise for 1 hour in a covered bowl in a warm place.

3. Divide the dough into 4 and, on a lightly floured surface, roll into balls with the palms of your hands.Then, using a rolling pin, flatten them slightly. Place on a baking tray lined with baking paper. You don't need to leave much space around them; they can rise into one another.

4. Using a fine sieve, dust with flour for a traditional finish, or, if you're going shiny and seeded, brush beaten egg over each bap.Cover loosely with cling film and leave in a warm place for 30 minutes.

5. Brush with a second coat of beaten egg and sprinkle with a pinch of poppy seeds, if using or finish them the Blackpool way with another dusting of flour. Cover loosely with cling film and leave for a final 30 minutes to rise.

6. Heat the oven to 200°C/Gas 6. Bake the baps until they are perfectly golden, about 12 minutes.

Please Enjoy!!!

Saturday, 25 March 2017

Seeded Bread Sticks

Hey Everyone,

So, this week I'm making another type of bread, but this time its for a starter and for dipping into things (like hummus), and as opposed to last weeks choice, this recipe is more for a starter than as the basis for an entire meal.
The recipe that I'm using for the bread sticks is a Mary Berry recipe, and it uses a seeded bread flour of your choice - I used sunflower seeds. However, for those with allergies or who simply don't like seeds in their bread, it's completely fine to use plain bread flour instead. The bread sticks are incredibly easy to make, with only a short time proving of about 20 minutes, so there is little effort involved in making these breads, perfect for a fancy dinner party!


Seeded Bread Sticks - From "Mary Berry Cooks" By Mary Berry

Makes about 25 Bread Sticks

Ingredients -

  • 250g White Seed and Grain Bread Flour
  • 1 Tsp Salt
  • 1 Tsp Sugar
  • 1 Tsp Easy-Blend Yeast
  • 2 Tbsp Olive Oil
  • Sesame Seeds or Poppy Seeds, Semolina or Polenta, for rolling the Bread Sticks
  • Sea Salt, to finish
1. Lightly oil two baking trays. Measure the flour, salt and sugar into a mixing bowl and stir in the yeast. Mix the oil with 150ml lukewarm water and add it to the flour. Mix well until it forms a soft dough, then turn it out on to the work surface and knead for 10 minutes (or for 4-5 minutes in a mixer with a dough hook).

2. Sprinkle the worktop with the sesame or poppy seeds, semolina or polenta and roll out the dough as thinly as possible into a rectangle - the seeds will stick to the outside of the dough. Cut the dough 1cm wide strips. Then roll each one between your hands to a pencil shape, trying to make sure there are seeds all the way around each stick. Place on the baking tray, spaced a little apart. Cover with clingfilm and leave in a warm place for about 15-20 minutes, until risen a little. Sprinkle with a little sea salt. Preheat the oven to 220°C/200°C Fan/Gas 7.

3. Bake the bread sticks for 10 minutes until golden brown and crisp. They will be soft inside at this stage; if you prefer drier grissini-style sticks, bake for a further 3 minutes. Allow to cool completely, then store in a tin for up to 3 day.

Please Enjoy!!!

Saturday, 18 March 2017

Pitta Breads

Hey Everyone,

So this week, I'm writing about an incredibly well-known bread which is found in virtually every supermarket there is - the Pitta Bread! This flatbread, which is used in Mediterranean, Middle Eastern and Balkan cooking, is simple to make with a guaranteed amazing result. They are baked at a high temperature in order to get them to puff up whilst in the oven, and then whilst they cool, the layers between the dough stay separated, creating the pocket inside the pitta.
It's within this pocket that you can place your filling, whether its falafels and salad or marmite and butter (two favourites of mine), theses unenriched breads it will always taste amazing!


Pitta Bread - From "Pizzas and Flatbread" in "The Big Baking Collection"

Ingredients -

  • 500g Strong White Bread Flour
  • 1 Tsp Fast-Action Dried Yeast
  • 1 Tsp Caster Sugar
  • 1 Tsp Salt
  • 4 Tbsp Oil Oil, plus extra for greasing
1. Mix together the flour, yeast, sugar and salt in a large bowl. Make a well in the centre and add the olive oil and 300ml lukewarm water. Using a wooden spoon, start mixing gently to combine the ingredients, and then mix and knead together for 5 minutes or until it forms a smooth dough. Cover with a clean tea towel and place the dough in a warm place for an hour or until has doubled in size.

2. Dust the work surface with flour and knead the dough briefly until smooth. Divide into 8 pieces and roll out into a thin oval shape, about 20 cm long. Grease 2 large baking trays and place 4 large ovals on each. Cover with oiled clingfilm and leave in a warm place for 20 minutes or until the dough has slightly risen.

3. Preheat the oven to 220°C (425°F/Gas 7). Brush the tops of the pittas with a little oil and bake for 10 minutes or until puffed and golden brown. Carefully transfer to a wire rack and serve while still warm.

Please Enjoy!!!

Saturday, 11 March 2017

Scarlett Moffatt's Scotch Eggs

Hey Everyone,

So, for those who don't know, Scarlett Moffatt is a "Gogglebox" star, who has also recently won "I'm A Celebrity Get Me Out Of Here!", so she's fairly well known in Britain. This has lead to her being on multiple other shows since her peak in fame such as "Jamie & Jimmy's Friday Night Feast", which is where I found this recipe. As it seemed relatively easy, I thought I'd try to make them, and share there tastiness on my blog!
I know that Scotch Eggs are typically made with sausage meat, but these are a little bit fancier than usual and are made, instead, with pork shoulder! Also, you are almost guaranteed to end up with much elusive gooey middle that everyone loves!


Scarlett Moffatt's Scotch Eggs - By Jamie Oliver and Scarlett Moffatt on "Jamie & Jimmy's Friday Night Feast"

Makes 6

Ingredients -

  • 1 Sprig of Fresh Rosemary
  • 1 Sprig of Fresh Sage
  • 600g Pork Shoulder, diced
  • 1 Whole Nutmeg, for grating
  • 1 Pinch of Smoked Paprika or Cayenne Pepper
  • 3 Anchovy Fillets
  • 8 Large Eggs
  • 100g Plain Flour
  • 200g Breadcrumbs
  • 3 Litres Vegetable Oil, for frying
1. Pick the rosemary and sage into a food processor, add the pork shoulder, a good grating f nutmeg, the smoked paprika or cayenne, anchovies and a pinch of sea salt and black pepper, then blitz to combine.

2. Cook 6 of the eggs in boiling salted water for 5 minutes, then remove to cold water, peeling once cool enough to handle.

3. Meanwhile, line up 3 shallow bowls - place the flour in first, beat the remaining eggs in the second, and tip the breadcrumbs in the third. Divide the meat mixture into 6, and roll into balls.

4. Place a piece of clingfilm on the palm of your hand, put a ball on top, then pat and flatten until it's big enough to wrap around the egg. Place an egg into the centre and mould the meat up around the egg, using the clingfilm to help you seal the egg inside and end up with a perfectly round ball. Discard the clingfilm.

5. Coat the ball in flour, dunk it in the egg, allowing the excess to drip off, then roll in the breadcrumbs until well coated. Repeat with the remaining ingredients, then chill in the fridge for 30 minutes to firm up.

6. When you're ready to cook, put a deep, sturdy pan on a medium-high heat and fill it about 8cm deep with vegetable oil (make sure you never fill the pan more then halfway up). Add a piece of potato to help you gauge the temperature - it's ready once the potato turns golden and floats (or when the oil reaches 170°C on a thermometer.

7. Carefully lower one Scotch Egg into the pan - after about 8 minutes it should be golden and perfectly cooked through, so take it out of the pan and cut it in half to see if you should have cooked it for less or more time - once you know where you stand, you can cook the rest in batches.

8. Delicious served with a dollop English mustard, Westcombe Cheddar, Piccalilli and a few saldy bits and pieces.

Please Enjoy!!!

Saturday, 4 March 2017

Za'atar and Goats' Cheese Puffs

Hey Everyone,

So, this recipe is from the Middle East this week, and is from another new book I've got called Sirocco. It's an amazing recipe as the two staple filling ingredients go together SO well and it barely took 10 minutes to prepare (and only 15 minutes to cook as well)!
For those who don't know, za'atar is the generic name for a family of related Middle Eastern spices including thyme, oregano and savory. The spice blend that you'd usually use in cooking is mixed with sesame seeds, dried sumac and salt as well. All together they taste amazing, and combined with the tart saltiness of the goats' cheese and the rich buttery pastry, it's a match made in heaven and great as a breakfast, or even as breakfast!


Za'atar and Goats' Cheese Puffs - From "Sirocco" By Sabrina Ghayour

Makes 20

Ingredients -

  • 1 x 320g Ready-Rolled Puff Pastry Sheet (about 350mm x 230mm)
  • Olive oil, for brushing
  • 2 Heaped Tbsp Za'atar
  • 300g Soft Goats' Cheese
  • Sea Salt Flakes and Freshly Ground Black Pepper
1. Preheat the oven 220°C/Gas Mark 7. Line a large baking tray with baking paper.

2. Lay the puff pastry sheet on a chopping leaving its greaseproof liner underneath. Ensure the longer edges of the pastry rectangle are parallel with the edge of your work surface. Brush the pastry with just enough olive oil to lightly coat the sheet, then sprinkle 1 tbsp of the za'atar evenly over the base.

3. Put the goats' cheese in a bowl and break it down using a fork. Distribute the cheese evenly over the pastry sheet, ensuring you leave a 2.5cm border at the longer edge of the pastry rectangle that is furthest from you. Season generously with salt and pepper, then sprinkle over the remaining za'atar.

Turn over the long edge of the pastry that is closest to you and start roll it up away from you- carefully roll up the pastry as tightly as possible without crushing it. Using a serrated knife, cut the roll in half and slice each half into 10 rounds. Pat each whirl flat to help them stay together during cooking, then place them on the prepared baking tray. Bake for 15 minutes or until golden brown. Serve immediately.

Please Enjoy!!!

Saturday, 25 February 2017

PORK RIBS AND DUMPLINGS

Hey Everyone,

So, do you find that if you're particularly interested in one hobby - for me, that would be cooking - ALL your gifts at Christmas or for your Birthday are somehow related to that hobby? Or at least most of them - not that I'm complaining! Anyway, last Christmas (among the many I received!) I got a recipe book called "Mamushka", which is full of traditional Ukrainian recipes.
Previously I've made other things from the book, including the Ukrainian take on biscotti, but this recipe was by far the tastiest! A couple of weeks ago, for my Mum's birthday (along with the White Chocolate Tartlets), I made Pork Ribs and Dumplings - not the conventional birthday meal, but still really tasty nonetheless!
The pork ribs were cooking for well over 2 hours, so the meat was literally falling off the bone, and whilst the dumplings are quite heavy, the feeling of absolute satisfaction and being seemingly about to burst open you're so stuffed is definitely worth it!


Pork Ribs and Dumplings - From "Mamushka" By Olia Hercules

Serves 8-10 as a feast

Ingredients -

  • 2 Tbsp Sunflower Oil
  • 1 Kg (2lbs) Pork Ribs, cut into individual ribs
  • 500g (1lb) Potatoes, peeled and quartered lengthways
  • 1 Large Onion, sliced
  • 50ml Apple Juice or Wine
  • 750ml Water
  • 1 Bay Leaf
  • Sea Salt Flakes and Freshly Ground Black Pepper
  • Sour Gherkins or Sour Aubergines, to serve
Dumplings
  • 2 x Recipe Quantities of Kefir Dough
  • Plain Flour, for dusting
  • 4 Tablespoons
Kefir Dough (Makes about 600g Dough - One Quantity)
  • 250g Kefir
  • 1/2 Tbsp Sunflower Oil
  • 1/2 Tbsp White Wine Vinegar
  • 1/2 Tbsp Granulated Sugar
  • 1/2 Tsp Salt
  • 350g Plain Flour, plus extra for dusting
  • 1 Scant Tsp Bicarbonate of Soda
1. Heat the sunflower oil in a large, heavy-based flameproof casserole dish. Season the ribs with salt and pepper and brown them really well over a high heat in batches, making sure they colour nicely. Lift them out the pan and set aside. Don't wipe the pan out.

2. Add the potatoes to the pan and brown well on each side. Add the onion, lower the heat and sweat for 10 minutes or until soft. Add the apple juice or wine and deglaze the pan.

3. Place the meat and its juices back in the pan and pour over enough of the measurement of water to cover. Add the bay leaf, season with salt and pepper and cook over a low heat for 2 hours or until the meat starts falling off the bones.

4. Meanwhile make the Kefir dough. To make the kefir dough, place the kefir, sunflower oil, vinegar, sugar and salt in a large bowl and mix together well with a fork. Sift the flour with the bicarbonate of soda, then sift again into the kefir mixture and mix in. The dough should be soft and pillowy. If it's still slightly sticky, heavily flour your work surface and start kneading the dough, incorporating more flour into it. The dough should stop sticking to your hands when it's ready but also remains soft. Divide it into 4 pieces.

5. Flour the work surface really generously and roll out one piece of dough into a rectangle 2mm (slightly less than 1/8 inch) thick. Pour 1 Tbsp of oil over it and rub it all over with your hand. Roll the dough up into a thick sausage shape. Twist it gently at both ends as you would if you were ringing out clothes. Repeat with the remaining dough and oil.

6. Slice each dough sausage into 5cm pieces. You should end up with about 35 dumplings.

7. now check how much liquid there is in the stew. It should be still wet, but not too much. You want your dumpling bottoms to absorb some of the juices, but the tops should steam.

8. Whack up the heat in your stew. It should be boiling like crazy.

9. Now swiftly bt gently pop the dumplings into the stew. Once they are all in, pop the lid over. Now steam should escape. Cook over a high heat for 15 minutes, then lower the heat and cook for another 30 minutes. Serve with Sour Gherkins or Sour Aubergines.

Please Enjoy!!!

Saturday, 18 February 2017

White Chocolate Tartlets

Hey Everyone,

So previously, you may have noticed that I've used a book on cupcakes called "The One and Only Cupcakes and Muffins Cookbook". It's amazing! However this week I'm making something from the other book the publishers released, "The One and Only Pies and Tarts Cookbook". Notice the similarities?!
From this book I made white chocolate tartlets for my Mum's birthday a while ago, and with the amount of chocolate and cream that went into them, it honestly wasn't surprising they tasted so good! When I made them, I had dome filling left over, so if you have an extra pastry in your fridge, you will be able to make extra!


White Chocolate Tartlets - From "The One and Only Pies and Tarts Cookbook"

Prep Time - 30mins, plus 3hrs cooling and chilling time
Cooking Time - 45mins

Makes 4

Ingredients -

For the Pastry

  • 100g Plain Flour
  • A pinch of Salt
  • 50g Butter
  • 1 Tbsp Caster Sugar
  • 1 Egg Yolk
For the Filling
  • 250ml Double Cream
  • 125g White Chocolate, broken into pieces
  • 1/2 Vanilla Pod, seeds only
  • 1 Eggs, separated
  • Raspberries and White Chocolate Shards, to decorate
1. To make the pastry, sift the flour and salt in a mixing bowl. Rub in the butter, using your fingertips until the mixture resembles breadcrumbs. Stir in the sugar until well combined. Stir in the egg yolk and 2 tablespoons cold water until the mixture forms a firm dough. Knead lightly on a floured surface. Cover with clingfilm and chill for 30 minutes.

2. Roll the pastry out on a lightly floured work surface and use to line 4 x 3cm deep, 9cm round, loose bottomed, fluted tartlet tins. Prick the base and sides with a fork, cover and chill for 30 minutes. Meanwhile, heat the oven to 190°C (375°F).

3. Line the pastry cases with baking parchment and baking beans and blind bake for 10 minutes. Remove the beans and paper and bake for a further 5 minutes. Remove from the heat.

4. Reduce the oven temperature to 160° (325°F). For the filling, melt together the cream and chocolate, stirring occasionally, until smooth. Remove from the heat and allow to cool.

5. Stir the vanilla seeds and egg yolk into the chocolate mixture. Whisk the egg white in a large bowl until soft peaking and then fold in chocolate mixture until well combined. Pour into the prepared pastry and bake for about 20-25 minutes, until the filling is set. Allow to cool and chill for 2 hours. Decorate with raspberries and shards of white chocolate.

Please Enjoy!!!

Saturday, 11 February 2017

JAFFA CAKES!

Hey Everyone,

So, this week I'm going to show you how to make one of my own favourite biscuits! I find that Jaffa Cakes are the perfect balance between cake, chocolate and fruit (if the jelly can count as that!) in a mouthful. It's actually surprising how simple they are to make - I mean, no-one stops and thinks if they are making a sponge, or a jelly, or melting chocolate, so why does it seem so difficult when they are all put together?
To be fair, the first time I attempted to make Jaffa Cakes, they didn't go quite to plan! After using a different (better) recipe, they worked amazingly! A lot of it is simply little tricks like not spreading the chocolate over the jelly as soon as it's melted, but to let it cool a little, so the jelly doesn't melt! (The first time I made them, I forgot to do this...)


Did you know that Jaffa Cakes where introduced in the UK, in 1927? Since then they've become more and more popular, and 90 years later, they're stil a household favourite and EVERYONE eats them. Seriously, our cake breaks at school (where you eat cake in the middle of a double period - it's great) are literally dominated by Jaffa Cakes. If anyone cannot think of what to bring in on their turn, Jaffa Cakes are always a perfect fall back option!


Jaffa Jelly Cakes - From "Cookies" Produced By Marks & Spencer

Ingredients -

  • 110g Caster Sugar
  • 2 Eggs
  • 150g Plain Flour
  • 2 Tbsp Caster Sugar
  • 400g Dark Eating Chocolate, melted
  • 3 Slices Glacé Orange, cut into wedges, optional
Orange Jelly
  • 250ml Orange Juice
  • 2 Tbsp Orange Marmalade
  • 85g Orange Jelly Crystals
1. Combine the orange  juice and marmalade in a small saucepan, bring to a boil; remove from heat. Add jelly crystals, stir until dissolved; cool. Line a deep 23cm square cake tin with baking parchment 5cm above edges of the tin. Pour the jelly into the tin; refrigerate until set.

2. Preheat the oven to 180°C/160°C Fan assisted. Grease oven trays; line with baking parchment.

3. Spread sugar evenly over base of shallow oven tray; heat in the oven until the sugar feels hot to touch. Beat eggs in a small bowl with an electric mixer. on a high speed for 1 minute; add hot sugar, beat for about 10 minutes or until the mixture is thick and will hold its shape.

4. Meanwhile, sift flour three times. Fit large piping bag with a plain 1cm nozzle.

5. Transfer the egg mixture into a large bowl, fold in the sifted flour. Place mixture into piping bag. Pipe 4cm rounds of mixture into baking trays, about 3cm apart.

6. Sprinkle each round evenly with extra sugar. Bake each tray, one at a time, about 4 minutes. Cool on trays.

7. Lift jelly from tin to board. Using a 4cm round cutter, cut out 25 shapes.

8. Top each sponge with a round of jelly, place on a wire rack over a tray; coat with chocolate. When chocolate is almost set, top with glacé orange wedges if you wish.

Sunday, 29 January 2017

Crème Caramels

Hey Everyone,

So, a classic pudding this week, the crème caramel! For those who don't know what this is, a crème caramel is a custard dessert, cooked in a bain-marie with a soft caramel topping - the complete opposite to a crème brulée which has a hard caramel top. Of course, I'm sure that you already knew that because (according to Wikipedia) the crème caramel is eaten worldwide!
So, if it's eaten across the world, have any of you tried making one? Whilst the shop bought ones taste great, and are certainly more convenient, I feel that a homemade crème caramel is the far better option!


Crème Caramels - From "Desserts" in "The Big Baking Collection"

Makes 6

Ingredients -
  • 600ml Full-Fat Milk
  • 1 Vanilla Pod, split lengthways and deseeded
  • 225g Golden Caster Sugar
  • 2 Whole Eggs, plus 4 Egg Yolks
1. Preheat the oven to 150°C/300°F/Gas 2. Pour the milk into a heavy based saucepan, add the vanilla pod, and very gently bring to the boil. Turn off the heat, cover the pan with lid and leave for 20 minutes. This is to give the vanilla pod time to infuse with milk while it cools.

2. Add half of the sugar to another heavy-based pan, then pour in 75ml of cold water. Slowly bring to the boil for about 15 minutes until the liquid turns a dark golden caramel. Pour this into ramekins, or use larger ones if making fewer crème caramels.

3. Put the remaining sugar with eggs and egg yolks into a bowl and whisk until well combined and the sugar has dissolved. Discard the vanilla pod and pour the cooled milk into the egg mixture, then briefly whisk again and pour through a sieve into the ramekins. Sit the ramekins in a deep ovenproof dish, pour in boiling water to come two-thirds of the way up the sides of the ramekins, and cook for one hour.

4. Remove this dish from the oven, leaving the ramekins in the hot water for 30 minutes to continue setting. Then leave to cool and chill overnight in the fridge. Turn out and serve.

Please Enjoy!!!

Sunday, 15 January 2017

Pomegranate Creams

Hey Everyone,

So, first post of the year and this is a pudding from the new Waitrose magazine, Pomegranate Creams. At the moment pomegranates are in season, so even if you don't make this dish, why not try and incorporate pomegranate into a meal!
This dessert is incredibly creamy and also the process in which you make it is not dissimilar to how you would make a posset - it is vital that if you do make, you heat the cream to the temperature it asks for in the recipe, as well as for the time it asks. Don't be rush the cooking process or the dessert won't set!
Pomegranate Creams are the perfect pudding to have when you invite friends over; it's tasty, easy to make and simply elegant to serve. Top with pomegranates and mint to finish your last course with a delicious (though I wouldn't say healthy!) dessert.


Pomegranate Creams - From "Waitrose Magazine, Issue 82, January 2017 Edition

Makes 6

Prepare Time - 25 Minutes, plus chilling
Cooking Time - 5 Minutes

Ingredients -
  • 2-3 Large Pomegranates
  • 1/2 Lemon, Zest and 2 Tsp Juice
  • 100g Caster Sugar
  • 500ml Double Cream
  • 6-8 Mint Leaves, shredded
1. Cut the pomegranates into quarters, remove the seeds and discard the pith. Set 3 Tbsp seeds aside. Place the rest in a food processor and blitz to release the juice. Strain into a bowl through the seize, pressing the pulp with a spoon.

2. Measure out 150ml pomegranate juice and put in a saucepan with the lemon zest and juice, sugar and cream. Bring to a boil, stirring to help the sugar to dissolve, then reduce the heat and simmer gently for 4 minutes. Strain through a seize into a jug and leave to cool for a few minutes for any froth to subside. Pour in to glasses and chill for least 4 hours or until set.

3. Before serving, scatter each cream with a few of the reserved pomegranate seeds and a little shredded mint.

Please Enjoy!!!